
Introduction
Welcome to the three part tutorial on real time data processing with Apache Kafka, Apache Storm, Apache HBase and Hive. This set of tutorials will walkthrough how geo-location information from vehicles can be combined with sensors on roads that report real-time events like speeding, lane-departure, unsafe tailgating, and unsafe following distances. We will capture these events in real time.
So, in this first tutorial, the events generated by sensors will be captured through a distributed publish-subscribe messaging system, Apache Kafka. In the second tutorial, we will use Apache Storm to process this data from Kafka and in the third tutorial we will persist that data into HDFS and Hbase.
Prerequisites:
- Hortonworks Sandbox
- 8GB RAM memory and preferably 4 processor cores, otherwise you may encounter errors in the third tutorial
Data set used
- New York City Truck Routes from NYC DOT.
- Truck Events Data generated using a custom simulator.
- Weather Data, collected using APIs from Forcast.io.
- Traffic Data, collected using APIs from MapQuest.
Apache Kafka
Apache Kafka supports a wide range of use cases as a general-purpose messaging system for scenarios where high throughput, reliable delivery, and horizontal scalability are important. Apache Storm and Apache Spark both work very well in combination with Kafka. Common use cases include:
- Stream Processing
- Website Activity Tracking
- Metrics Collection and Monitoring
- Log Aggregation
Some of the important characteristics that make Kafka such an attractive option for these use cases include the following:
-
Scalability Distributed messaging system scales easily with no downtime
-
Durability Persists messages on disk, and provides intra-cluster replication
-
Reliability Replicates data, supports multiple consumers, and automatically balances consumers in case of failure
-
Performance High throughput for both publishing and subscribing, with disk structures that provide constant performance even with many terabytes of stored messages
Apache Kafka concepts
Kafka works like a distributed commit log, where incoming data is written sequentially to disk. There are four main components involved in moving data in and out of Kafka:
- Topics
- Producers
- Consumers
- Brokers
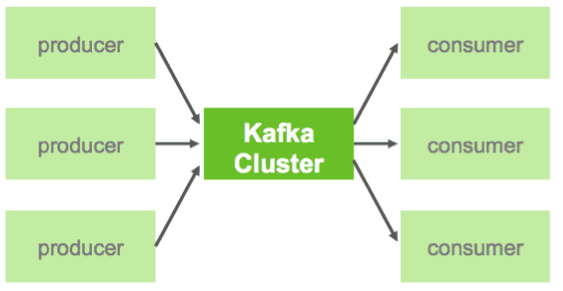
In Kafka, a Topic is a user-defined category to which messages are published. Kafka Producers publish messages to one or more topics and Consumers subscribe to topics and process the published messages. So, at a high level, producers send messages over the network to the Kafka cluster which in turn serves them up to consumers. Finally, a Kafka cluster consists of one or more servers, called Brokers that manage the persistence and replication of message data (i.e. the commit log).
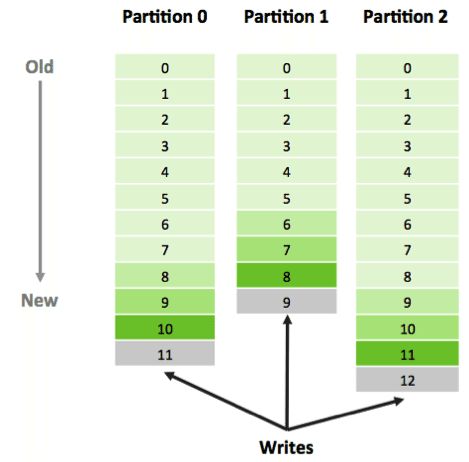
One of the keys to Kafka’s high performance is the simplicity of the brokers’ responsibilities. In Kafka, topics consist of one or more Partitions that are ordered, immutable sequences of messages. Since writes to a partition are sequential, this design greatly reduces the number of hard disk seeks.
Another factor contributing to Kafka’s performance and scalability is the fact that Kafka brokers are not responsible for keeping track of what messages have been consumed – that responsibility falls on the consumer. In traditional messaging systems such as JMS, the broker bore this responsibility, severely limiting the system’s ability to scale as the number of consumers increased.
For Kafka consumers, keeping track of which messages have been consumed (processed) is simply a matter of keeping track of an Offset, which is a sequential id number that uniquely identifies a message within a partition. Because Kafka retains all messages on disk (for a configurable amount of time), consumers can rewind or skip to any point in a partition simply by supplying an offset value. Finally, this design eliminates the potential for back-pressure when consumers process messages at different rates.
Hand-on Lab
We will begin with configuring settings of Apache Kafka and Zookeeper. Next we will create a topic named ‘truckevent’. Topic is a is a user-defined category to which messages are published. Next, We will create Producer and Consumer. Producers will publish random messages to the topic and Consumer will subscribe the messages related to a topic(in our case ‘truckevent’). We have also included code highlights at the end of this tutorial for your reference.
Step 1: Login to Ambari
- Start the Hortonworks Sandbox.

- Login to Ambari
Go to port 8080 of your Sandbox’s IP address to view the Ambari login page. For example, http://127.0.0.1:8080:
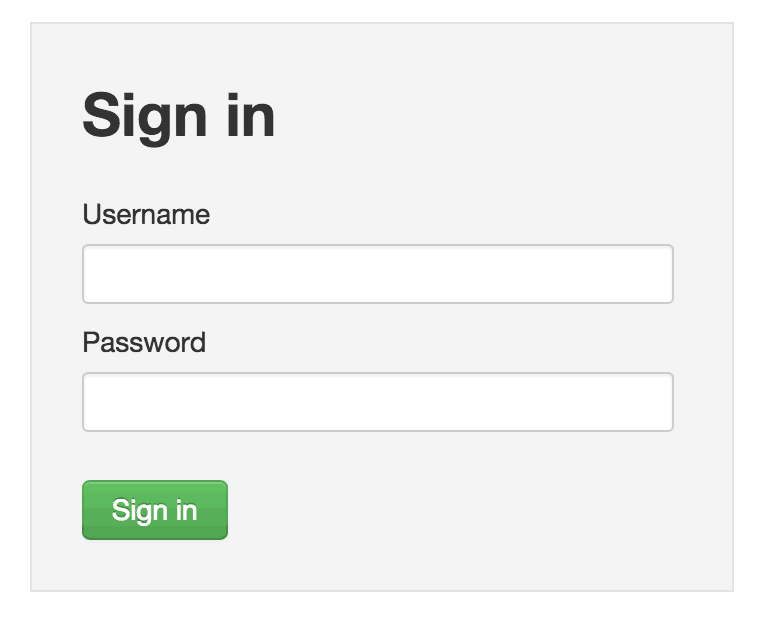
The username and password are both admin.
Step 2: Start Kafka
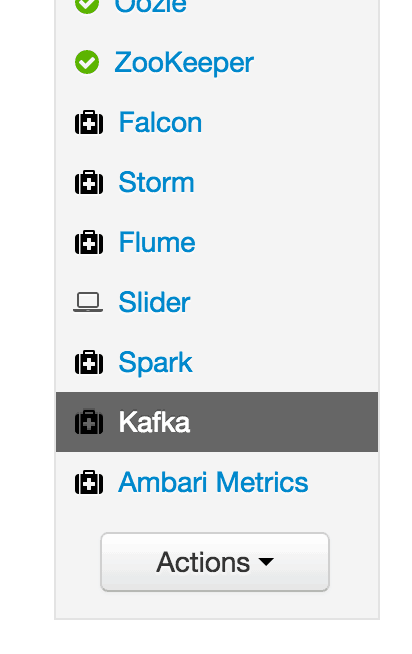
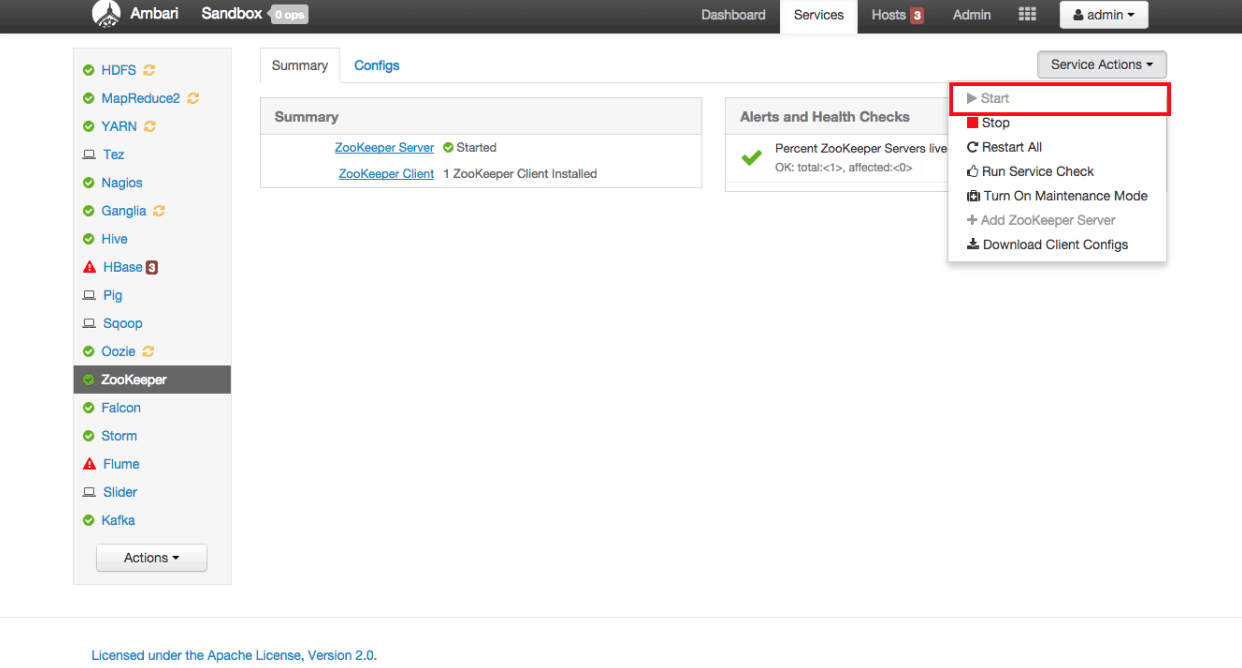
- View the Kafka Services page
From the Dashboard page of Ambari, click on Kafka from the list of installed services:
- Start Kafka
From the Kafka page, click on Service Actions -> Start:

Check the box and click on Confirm Start:
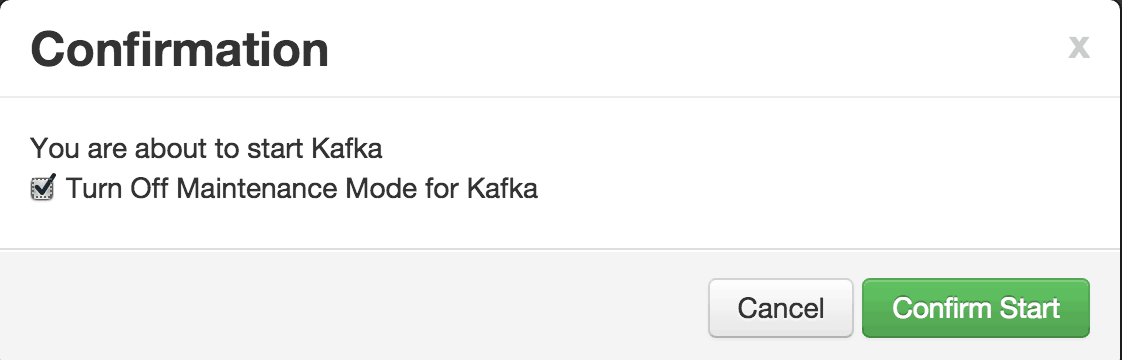
Wait for Kafka to start.
Step 3: Configure Kafka with ZooKeeper
ZooKeeper serves as the coordination interface between the Kafka broker and consumers:
The important Zookeeper properties can be checked in Ambari.
- Configure ZooKeeper
Click on ZooKeeper in the list of services, then click on the Configs tab. Verify ZooKeeper is running on port 2181:
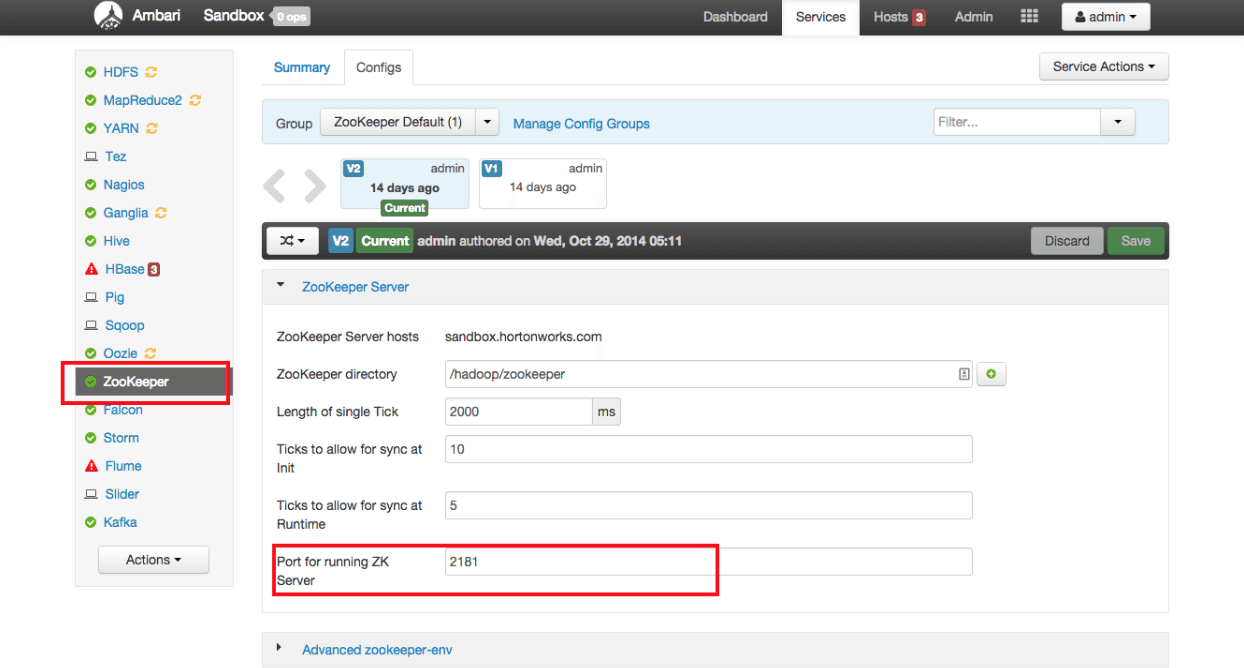
If this port 2181 is busy or is consumed by other processes, then you could change the default port number of ZooKeeper to any other valid port number. If ZooKeeper is not running, you can start the Zookeeper service from Ambari:
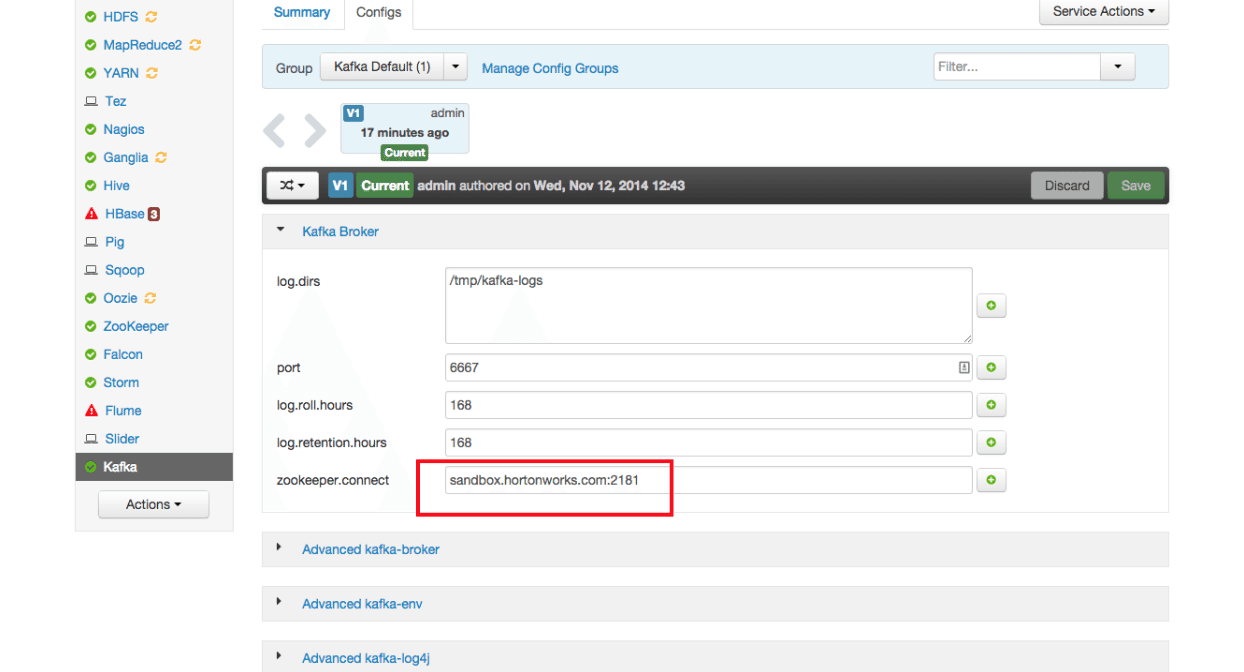
- Configure Kafka
From the Kafka page, click on the Configs tab. Verify the ‘zookeeper.connect’ property points to your ZooKeeper server name and port:
Step 4: Define a Kafka Topic
- SSH into the Sandbox
We will SSH in to the Sandbox to the perform the remaining tasks of this tutorial. Open a commandline shell to our Sandbox from terminal:

The default password is hadoop
- Create a new Topic
Using the kafka-topics.sh script (which should be in your PATH), create a new topic named ‘truckevent’:
kafka-topics.sh --create --zookeeper localhost:2181 --replication-factor 1 --partitions 1 --topic truckevent
Also note that sometimes ZooKeeper does not listen on localhost, so you may need to use the Sandbox’s IP address instead.
The output should look like:

- Verify the topic was created successfully
Check if topic ‘truckevent’ was created successfully with the following command:
kafka-topics.sh --list --zookeeper localhost:2181
You should see truckevent in the list of topics (and probably your only topic):

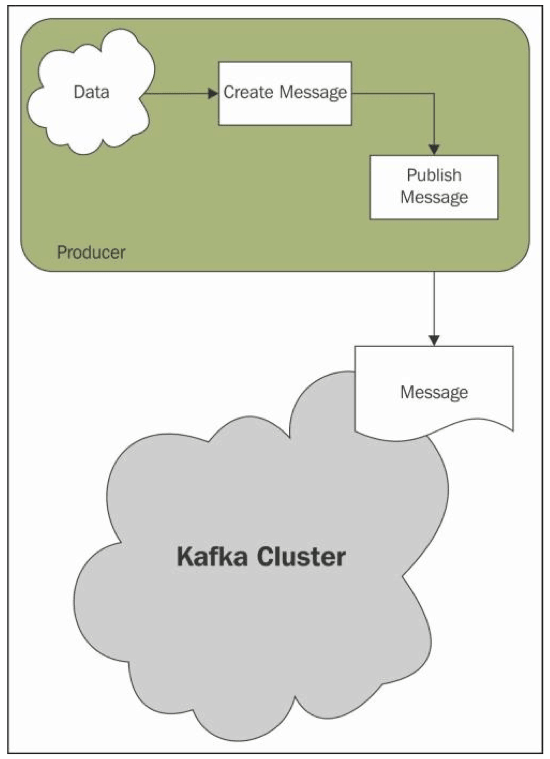
Overview of Producing Messages
Producers are applications that create Messages and publish them to the Kafka broker for further consumption:
In this tutorial we shall use a Java API to produce Truck events. The Java code in TruckEventsProducer.java will generate data with following columns:
`driver_name` string,
`driver_id` string,
`route_name` string,
`route_id` string,
`truck_id` string,
`timestamp` string,
`longitude` string,
`latitude` string,
`violation` string,
`total_violations` string
This Java Truck events producer code uses New York City Truck Routes (kml) file which defines road paths with Latitude and Longitude information.
Step 5: Download the Data
- Download the New York City Truck Routes
Run the following commands to download the TruckEventsProducer Java code and the NYC Truck routes kml file. This may take a minute or two to download depending on the internet connection
mkdir /opt/TruckEvents
cd /opt/TruckEvents
wget [https://www.dropbox.com/s/rv43a05czfaqjlj/Tutorials-master-2.3.zip](https://www.dropbox.com/s/rv43a05czfaqjlj/Tutorials-master-2.3.zip)
unzip Tutorials-master-2.3.zip
cd /opt/TruckEvents/Tutorials-master
Note: The source code for all the tutorials is located in “src” subdirectory and the pre-compiled binaries for all the tutorials are in the “target” subdirectory.
Step 6: Run Kafka Producer
To start the Kafka Producer we execute the following command to see the output as shown in the screenshot below.
java -cp target/Tutorial-1.0-SNAPSHOT.jar com.hortonworks.tutorials.tutorial1.TruckEventsProducer sandbox.hortonworks.com:6667 sandbox.hortonworks.com:2181

After a few seconds, press Control-C to stop the producer.
We have now successfully compiled and had the Kafka producer publish some messages to the Kafka cluster.
To verify, execute the following command to start a consumer to see the produced events:
/usr/hdp/current/kafka-broker/bin/kafka-console-consumer.sh --zookeeper sandbox.hortonworks.com:2181 --topic truckevent --from-beginning

You can press Control-C to stop the console consumer
##Code description:
###Producer:
We use the TruckEventsProducer.java file under the src/main/java/tutorial1/ directory to generate the Kafka TruckEvents. This uses the all_truck_routes_nyc.kml data file available from NYC DOT. We use Java API’s to produce Truck Events.
[root@sandbox ~]# ls /opt/TruckEvents/Tutorials-master/src/main/java/com/hortonworks/tutorials/tutorial1/TruckEventsProducer.java
[root@sandbox ~]# ls /opt/TruckEvents/Tutorials-master/src/main/resources/all_truck_routes_nyc.kml
The java file contains 3 functions
- public class TruckEventsProducer
We configure the Kafka producer in this function to serialize and send the data to Kafka Topic ‘truckevent’ created in the tutorial. The code below shows the Producer class used to generate messages.
String TOPIC = "truckevent";
ProducerConfig config = new ProducerConfig(props);
Producer<String, String> producer = new Producer<String, String>(config);
The properties of the producer are defined in the ‘props’ variable. The events, truckIds and the driverIds data is selected with random function from the array variables.
Properties props = new Properties();
props.put("metadata.broker.list", args[0]);
props.put("zk.connect", args[1]);
props.put("serializer.class", "kafka.serializer.StringEncoder");
props.put("request.required.acks", "1");


String[] events = {"Normal", "Normal", "Normal", "Normal", "Normal", "Normal", "Lane Departure","Overspeed", "Normal", "Normal", "Normal", "Normal", "Lane Departure","Normal","Normal", "Normal", "Normal",  "Unsafe tail distance", "Normal", "Normal","Unsafe following distance", "Normal", "Normal", "Normal","Normal","Normal","Normal","Normal","Normal","Normal","Normal","Normal","Normal","Normal", "Normal", "Overspeed","Normal", "Normal","Normal","Normal","Normal","Normal","Normal" };


String[] truckIds = {"1", "2", "3","4"};
String[] routeName = {"route17", "route17k", "route208", "route27"};
String[] driverIds = {"11", "12", "13", "14"};
KeyedMessage class takes the topic name, partition key, and the message value that needs to be passed from the producer as follows:
- class KeyedMessage
KeyedMessage<String, String> data = new KeyedMessage<String, String>(TOPIC, finalEvent);
The Kafka producer events with timestamps are created by selecting the data from above arrays and geo location from the all_truck_routes_nyc.kml file.
KeyedMessage<String, String> data = new KeyedMessage<String, String>(TOPIC, finalEvent);
LOG.info("Sending Messge #:" + i +", msg:" + finalEvent);
producer.send(data);
Thread.sleep(1000);
To transmit the data we now build an array using the GetKmlLangList() and getLatLong() function.
- private static String getLatLong
This function returns coordinates in Latitude and Longitude format.
if (latLong.length == -1)
{
  return latLong[1].trim() + "|" + latLong[0].trim();
}
- public static String[] GetKmlLanLangList
This method is reading KML file which is an XML file. This xml file is loaded in File fXmlFile variable.
File fXmlFile = new File(urlString);
Which will parse this file by running through each node (Node.ELEMENT_NODE) in loop. The XML element “coordinates” has array of two items lat, long. The function reads the lat, long and returns the values in array.
##Conclusion
This tutorial gave you brief glimpse of how to use Apache Kafka to transport real-time events data. In our next tutorial, you will see how to capture data from Kafka Producer into Storm for processing
####Appendix A: Installing Kafka
Follow these steps if your version of the Sandbox does not have Kafka installed:
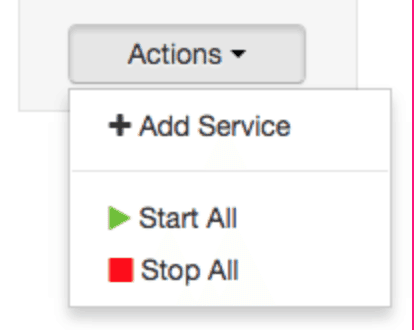
- From the Ambari Dashboard, select Actions -> Add Service:
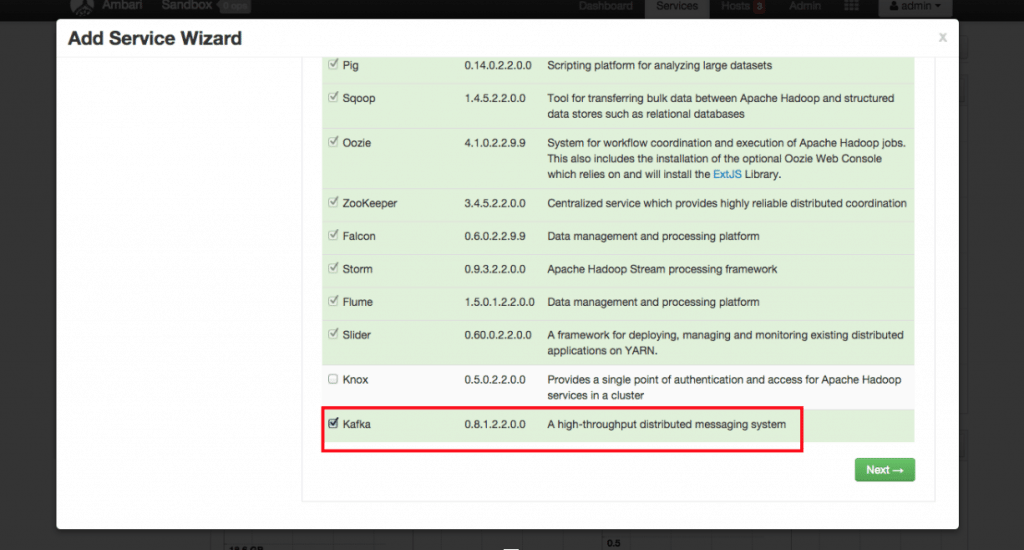
- Select Kafka from the list of Services and click Next:
- Keep clicking Next with the selected defaults until you reach the following screen:
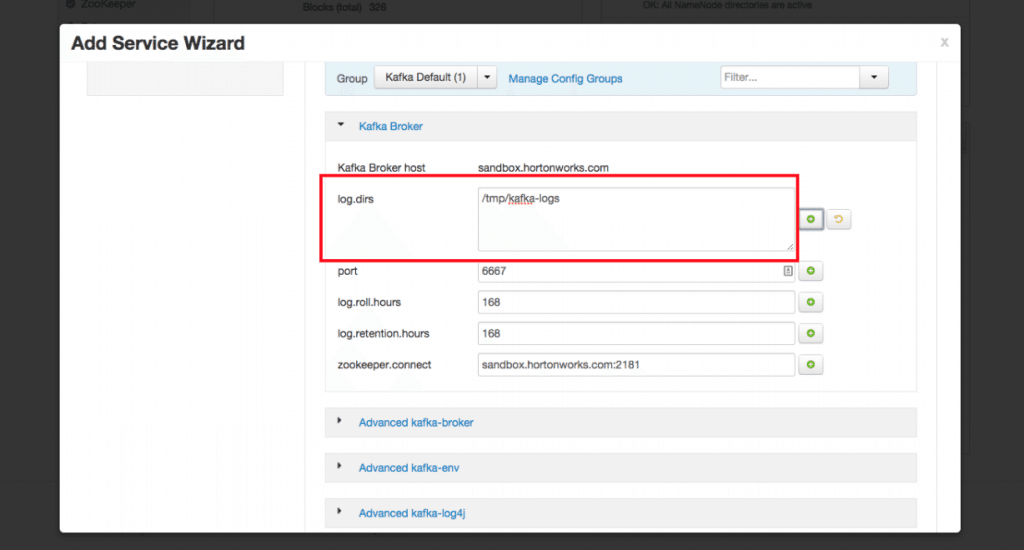
-
Set the value of logs.dir to /tmp/kafka-logs
-
Click the Deploy button:
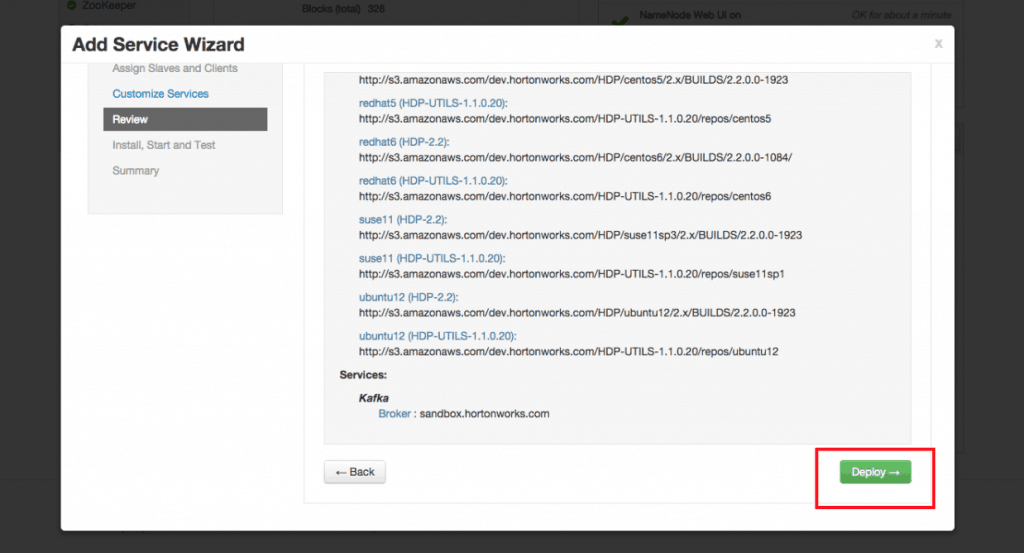
- Wait for Kafka to install:
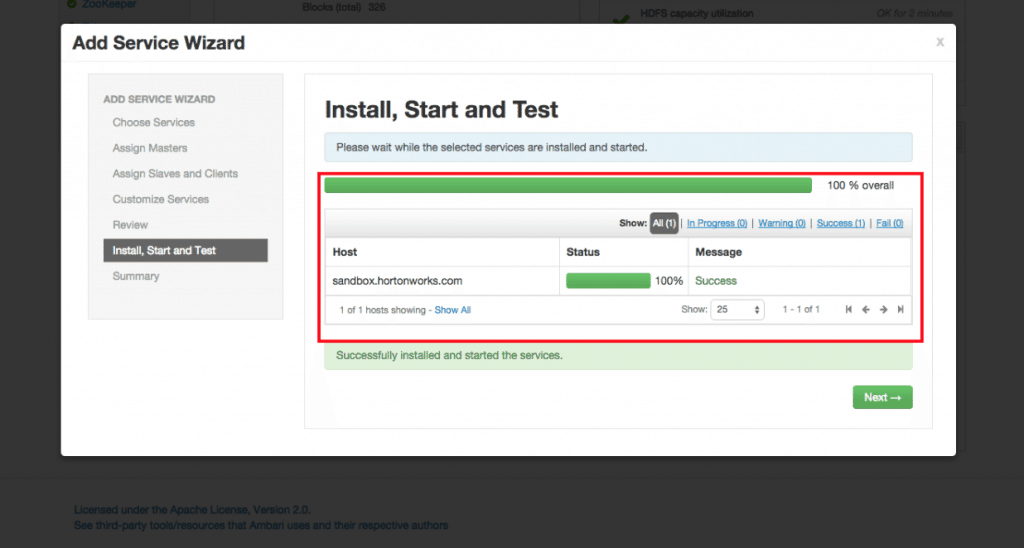
- After Kafka is installed, you may be asked to restart some dependent Services. Please select the appropriate Services and click Restart.
####Appendix B: Install Maven and compile
Download and install Apache Maven as shown in the commands below
curl -o /etc/yum.repos.d/epel-apache-maven.repo [https://repos.fedorapeople.org/repos/dchen/apache-maven/epel-apache-maven.repo](https://repos.fedorapeople.org/repos/dchen/apache-maven/epel-apache-maven.repo)
yum -y install apache-maven
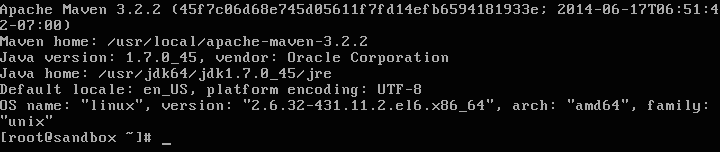
mvn -version
Now lets compile and execute the code to generate Truck Events. (This may run for a 5-6 minutes, depending on your internet connection)
cd /opt/TruckEvents/Tutorials-master
mvn clean package
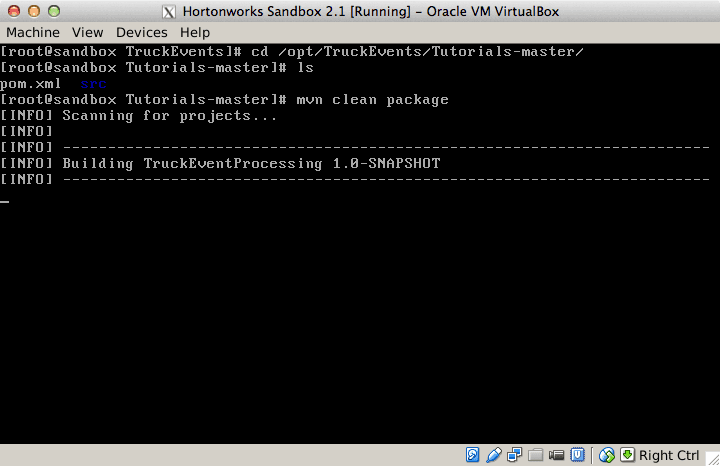
Once the code is successfully compiled we shall see a new target directory created in the current folder. The binaries for all the Tutorials are in this target directory and the source code in src.


Saptak Sen
If you enjoyed this post, you should check out my book: Starting with Spark.